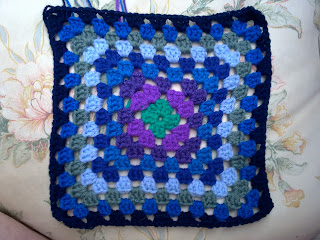
Now we're rolling. You should be up and running after this (hopefully)!
Lesson No. 5 - Joining a Different Colour and Working a Round
Items needed - one ball of wool and a crochet hook.
Skill needed - to be able to chain, controlling the hook, the wool and the work confidently. If you are not confident using the hook yet do practise just chaining until you are not fighting with holding the wool and the hook.
Remember these abbrieviations?
ch - chain
st - stitch
sl st - slip stitch
tr - treble
yo - yarn over
cl - cluster
Good. Here are the instructions up to the end of Lesson 4.
Begin with a slip knot and ch 3.
Join with a sl st to form a ring.
Ch 3 (this was the 'pretend' first treble), 2 tr, ch 2 (first corner)
3 tr, ch 2 (second corner)
3 tr, ch 2 (third corner)
3tr, ch2 then sl st to first cl
Fasten off.
There are different ways of joining the next colour. This is what I do.
Put the hook through a corner space (I've gone through the space where I left off in the first round) and hook the second colour.
Bring the colour through the hole and keep the end of the wool alongside the main thread.
Yo (working the end in) and ...
... ch 3. (I've now worked in the end which saves weaving it in later.)
2 tr (to finish the first cluster), ch 1 (to get to the second corner).
In the second corner work 3tr, ch2, 3tr. Ch 1 (to get to the third corner).
3 tr, 2 ch, 3 tr, ch 1 (third corner)
3 tr, 2 ch, 3 tr, ch 1 (fourth corner)
It needs one more treble cluster to finish the round.
3 tr, ch 2
On this final cluster I've worked over the loose end from the previous round. This helps to secure the end.
Join with a sl st to the first cluster and fasten off.
Just repeat these instructions with different colours until you have a square you are happy with. I work 5 rounds usually but you can make them whatever size you wish.
Here's the back of the small square. See the end I worked over?
Fasten it off by stitching over some threads 3 or 4 times, pulling it tight.
Hopefully you will not be able to see the fastening off.
There is a slightly different way of getting to a next round if you want to keep the same colour.
Work the first round until you reach the final corner. For this corner only ch 1.
Insert the hook at the top of the first cluster, yo and draw through.
There are now 2 stitches on your hook, yo and draw through 2.
Now work the next round.
Yo and ch 3
And off you go round again chaining 1 across the sides of the square and chaining 2 at the corners.
Happy Grannying!
Please shout for any more help if you've been following the last few days and please tell me if I've planted the Granny seed in you!


Ooooh Mum, so glad you have done this one, I was a little concerned about my finishing the round technique, but now I see that where I was going wrong - thank you so much for sharing these tutorials with us - I am now an addicted grannier!! Lesley xx
ReplyDelete"If I can help somebody, as I pass along ... "
DeleteYeah, yeah, yeah!
xx
I taught myself to crochet last year from you tube tutorials so I've been following your Granny Along to see if I'm doing it right. Everything was the same until changing colour, and there's a couple of differences there, but nothing major. I think I'm on the right track.
ReplyDeleteThis is getting so exciting. Thanks Mum!
ReplyDeleteSft x
Thank you so much - so simple when you know how!!!
ReplyDeleteH x
Ok - I've managed to get to the 4 corners part - plenty more practice needed as I'm doing it too tight! I'll practice some more tonight and over the weekend and then try the next lesson - thank you lots
ReplyDeleteH x
Brilliant - keep going!
Deletexx
Ummm I think I'm doing it wrong somehow! I have more of a circle than a square - any idea what I'm doing wrong?
DeleteH x
Any chance of seeing a picture of your creation on your blog?
Deletexx
Helen, are you on your first colour? If you are on your first round it will probably look circular. Did you chain 2 for each corner? If you pull the corners out a bit you will see that it is square shaped. Try doing a second round to see if it squares up.
Deletexx
Thanks for the help - I'll have another go tomorrow and do a second round - I can see that it should look like a square but the corners appear rounded lol. I'm determined to crack it though as I love the whole crochet thing
ReplyDeleteH x
PS I'll try a photo too but the last one was more luck than judgement hehe
This is great. My sister in law showed me how to make a granny square and this will be a good reminder. I haven't tried to tackle one yet I 'll keep a link to this. Thank you. Susan
ReplyDeleteYAYY! thank you I've done it, I'm granny squaring! So excited thank you
ReplyDelete