Thursday, 6 December 2012

Mum's Advent Calendar 6, Days Left 19


12 steps to Christmas tree decorating


You will need:

one hammer plus nails
one dining chair
one sweeping brush
one dustpan and brush
2 milk crates
one large plastic tub
one pair of scissors
one Christmas tree
one stand
lights
decorations
Advent tree


1. Fix tree to stand and cut off netting with the scissors.


2. Put tree on large tub to gain height - too tall. Take it off large tub, walk to garage to get milk crates and repeat with crates - decide on one crate and take large tub and other crate back to garage. Adjust tree to vertical and break stand.Go to garage to find last year's stand or mend first stand. Attach stand to tree with nails. (OH leaves the room - his task is done.)

4. Untangle 5 sets of lights to find the set that was put on the tree last year. Plug in lights BEFORE PUTTING ON TREE.


5. Put on 2 sets of lights then take one set off - try again with another set that's long enough.

6. Put on the silver decorations then decide to use the gold, green and red ones instead - take off the silver decorations.
7. Decide to put flowers on the tree and walk upstairs to the loft to find them.
8. Put tinsel back in bag because you've used the flowers instead.
9. Walk upstairs to find the angel for the top of the tree.
10. Use the sweeping brush to position the angel.


11. Use sweeping brush and dustpan and brush to brush up the pine needles.
12. Take pictures of the tree in progress then walk upstairs again to find the crocheted Advent tree. Take more pictures with the Advent tree on the tree.


Throughout the above procedure listen to Christmas songs on the laptop and eat DD's chocolates.

Welcome to my new follower.

Wednesday, 5 December 2012

Mum's Advent Calendar 5, Days Left 20

Decorations out of the loft time. I think you could call this a collection. It's very difficult to throw any of them away.  I'm putting them up bit by bit as and when the fancy takes me.

Now what shall we have on the juke box?


Ah yes!


Lights up in the kitchen and ...


... a garland for the bannister.


Looking a little bit festive now. Off to order the tree later.


xx

PS The Advent tree was on the right hand side of the last pic yesterday. The was only a tiny bit of it showing.

Alison, hi, get that blog started. Make it a New Year's Resolution! Not too sure of Bloggy Blanket  whereabouts at the moment. MummyHen was trying to find another contributor. MummyHen are you out there? Foster Mummy is still up for more squares. All contributors welcome. Please read the Bloggy Blanket pages and volunteer.

Tuesday, 4 December 2012

Mum's Advent Calendar 4, Days Left 21

Blanket peek-a-boo.

Please use your imagination. These stripes represent - 

Snowflakes,


Mistletoe,


Holly and 


Father Christmas.


These squares depict Poinsettia ( pattern found here) and


Christmas Trees


I'm just over half way through the Christmas blanket and apart from a few more poinsettias it should be plain sailing to the end. Whether I finish or not for Christmas is a different matter but it's starting to get a little festive round here. Sherry anyone?

PS - only a tiny, tiny peep of the Advent Christmas tree in one of the pics today.

Sunday, 2 December 2012

Mum's Advent Calendar 3, Days Left 22

It's not sealed but it's out of the way. 


I own up  - I have dipped into it so I've been busy picking pockets and raiding drawers to find any loose change just to top it up.


Let's have a sort and copper up.


Lots of little piles here especially 1p pieces!


A few Euros, a trolley coin, a sequin, an old 10p and half pences and a black something or other! I daren't look too closely.


Wow - £94.84 to go towards Christmas. I shall look forward to viewing everyone else's sealed pot today to see how they have fared.

And here's the container for next year (I think).
Uncle Joe's mintballs
Keep you all aglow!

I should be able to fit a fair bit of change in there.


Thanks SFT for arranging the Sealed Pot Challenge.

Welcome new followers, good to see you - and Carol I  recognised your walk along the promenade but where was the walk in the country by the church?
xx

Mum's Advent Calendar 2, Days Left 23

Better get these cards written early. Most of my cards are everlasting Christmas cards which are homemade cards sent back and forth over the years. Some of my envelopes are homemade too.


Other cards I've put in my Cigar Paper envelopes from the CS.


Most cards are made from scraps ...


... and some are sewn.


DD's card to her old childminder has been backwards and forwards since 1996.


It's looking a bit worse for wear now. I'll have to put a few more sparkles on to cover up the grotty bits.


I've used cut up Christmas cards for some of the decorations.


Some people send a homemade card back so we have 2 cards on the go.


I keep cards that can't be sent anymore. This card is DH's mother's. We sent it to her one Christmas and she kept it. We keep it now. As you can see, she was a great cat lover.


xx

I'm linking with KC's Court with my December posts.
Not very hard to spot the tree today, was it?

Saturday, 1 December 2012

Mum's Advent Calendar 1, Days Left 24

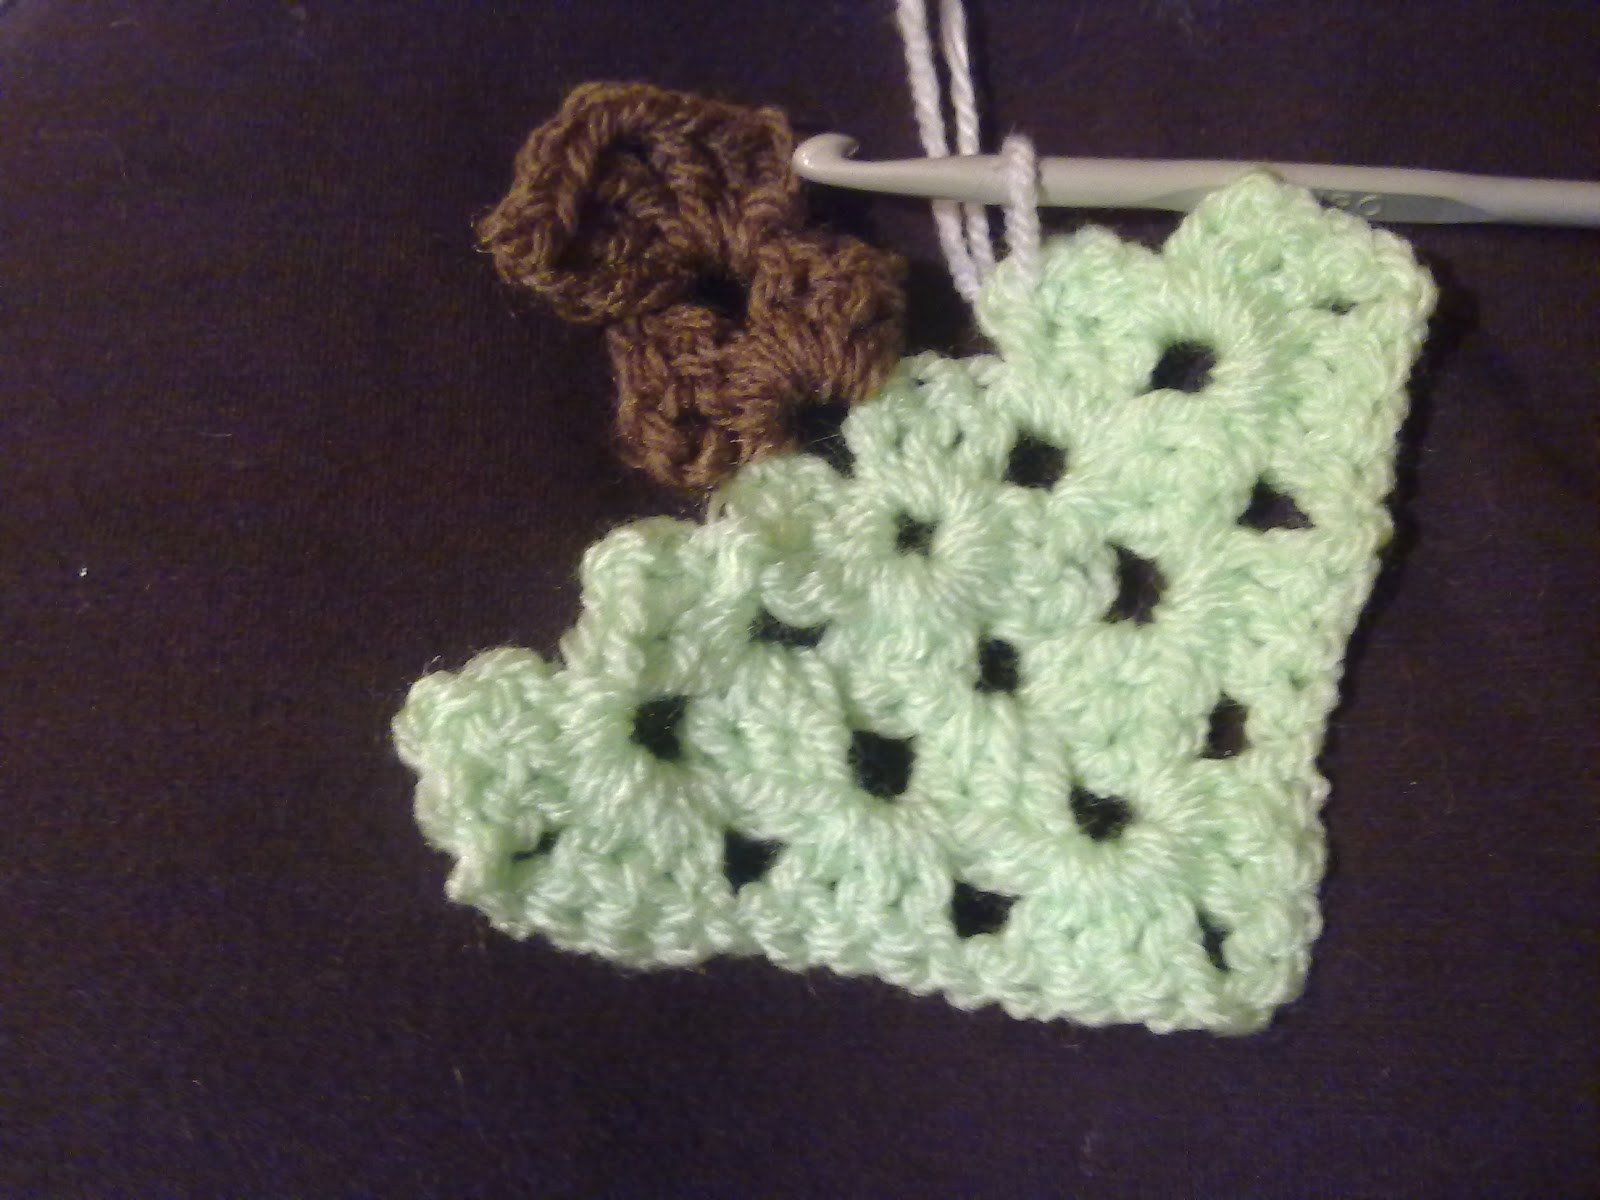
As promised here is the tutorial for my Christmas Tree Granny Square, which I'm incorporating into my Christmas Zig Zag blanket. This square can be done a number of ways. Here's one way with UK crochet terms.

The first round is just like a normal granny.

With green chain 3 and join to form a ring with a slip stitch. 

Ch 3, 2 trebles, ch 2
3 trebles, ch 2
3 trebles, ch 2
3 trebles, ch 1
Join to first treble (the first ch 3) with a dc.


 In space below ch 3 (first treble), 2 trebles, ch 2, 3 trebles, ch 2
In next and 3rd corner space do the same.


Join brown (I knot it to the green and crochet in the end) and complete the second round. Fasten off the brown.


In space between the last brown shell and the first green, join the white and work one shell. Join green.


Work all the way round to the 3rd corner then join in the white.


Work one shell then join the brown, ch 1, 3 treble, ch 2, 3 treble, ch 1 and join to the first white shell. Fasten off the brown.


The last round is done in white and you should end up with a completed granny tree square.


Another way of doing this square is to work all the green in one go, then all the brown. The white would still have to be joined and finished a couple of times before the final round. Here's one I did this way.

With green chain 3 and join to form a ring with a slip stitch. 

Ch 3, 2 trebles, ch 2
3 trebles, ch 2
3 trebles, ch 2
3 trebles, ch 2
Join to first treble (the first ch 3) with a slip stitch, ch 3. Turn.


In same chain 2 space, 2 trebles ch 2, 3 trebles ch 1.
In next chain space 3 trebles ch 2, 3 trebles ch 1.
In next 2 chain space 3 trebles, ch 2, 3 trebles. Turn.


Slip stitch across the top of the treble shell to the 2 chain space then ch 3.
In same space work 2 trebles, ch 2, 3 trebles.


Work your way round to the 3rd corner as a normal granny square and fasten off the green.


Join the brown in the centre 2 chain space on the long side (hypotenuse).
Ch 3, 2 treble, ch 2, 3 treble. Turn.


Slip stitch to the 2 chain space and Ch 3, 2 treble, ch 2, 3 treble. 


Fasten off the brown.


This next bit is the fiddly part to put in 2 white treble shells. Join the white on the 3rd treble as shown below. Dc into the first brown treble then ch 3. Turn.


Ch 1 and slip stitch into the first green treble. Turn.


Slip stitch across the white shell then ch 1 and slip stitch onto the brown trunk.


Repeat for the other white shell.


All that is required now is the final round in white.


Hope all these instructions make sense and I've not made any mistakes in writing them down. Let me know if I have.

I'm also putting into the blanket a poinsettia granny square which I'll show you in another post.
xx

PS Did you spot the Advent Christmas Tree?

Click on the Advent Calendar label for more reading and on my December posts for last year for the Snowflake Calendar.